
Authors: Bharadwaj Kopparthi and Mark Tossell
Aim of this post:
In this post, we will look at importing CRM Analytics (CRMA) assets into the local machine and deploying them to a specific target Salesforce org. After that, we will go one step further and talk about source controlling with git using the VS Code git integrations.
We will work with three pieces of software in this post”
- Salesforce CLI: This has a suite of command line instructions which assist development on the Salesforce platform
- VS Code: VS Code acts as a text editor to write code targeting the Salesforce platform.
- Git: Git is a renowned source control software. VS Code has good integration with git right out of the box. There are several implementations of git source control, but we will be focusing on github.com
What won’t be covered in this post
We won’t be talking about the intricate details of each of the softwares that we use in this post. We will be strictly focusing on how to use this suite of softwares to “deploy and source control CRMA Assets”.
How to read this post
You can’t connect dots looking forward. You can only connect them looking backward. – Steve Jobs
This post won’t make sense while you are working with it. It starts to make sense only after you complete the setup as suggested in this post. If you feel lost, understand that it is totally normal for anyone who is setting up their system for the first time.
Installation and Setup:
Salesforce CLI installation:
Salesforce CLI as described in the official website:
The Salesforce CLI is a powerful command line interface that simplifies development and build automation when working with your Salesforce org
We will be using Salesforce CLI to retrieve and to deploy analytics assets. Install Salesforce CLI from this link:https://developer.salesforce.com/tools/salesforcecli
Optionally, you can also install the Analytics plugin for Salesforce CLI to get features to create and maintain templated apps in Tableau CRM, but we won’t need it for this session. Installation steps for Analytics plugin here: https://help.salesforce.com/articleView?id=bi_cli_analytics_plugin_install.htm&type=5
VS Code Installation & Setup:
Visual Studio Code is an open source text editor that Salesforce officially recommends for development. If you are looking for an in depth guide on VS Code setup, follow this trailhead: https://trailhead.salesforce.com/content/learn/projects/quickstart-vscode-salesforce. Otherwise, here is the gist of it:
- Download and install VS Code from this link: https://code.visualstudio.com/
- Now launch VS Code, go to extensions to install Salesforce Extension Pack and re-launch the application if necessary.
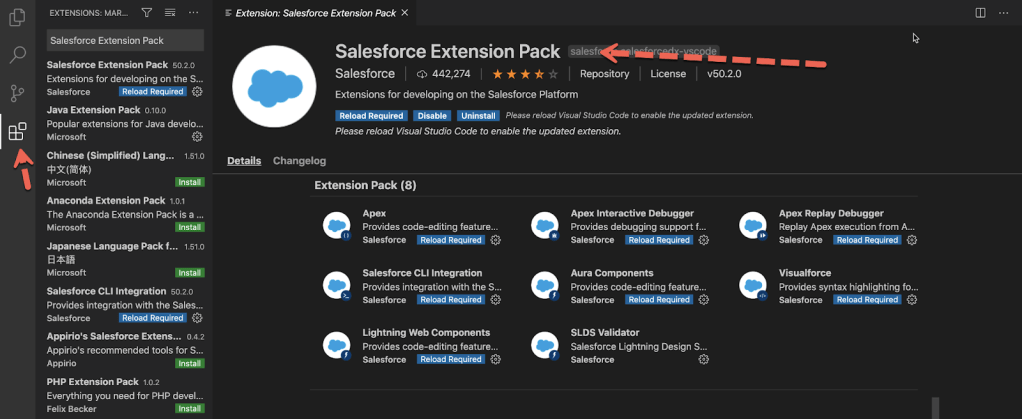
The Salesforce Extension Pack contains plugins to integrate Salesforce CLI with VS Code. These plugins abstract the command line instructions that we will have to write when working with Salesforce CLI with a simple, easy-to-use interface.
Git Installation:
If you are on a Mac or one of many distributions of linux, chances are that your operating system already has git installed. To verify, type the command git –version in terminal and check if you get a valid version number as response git version 2.29.1 – as long as you get a version number, you are fine. You will have to install git if you get a response saying command not found. Download and install git from https://git-scm.com/. Once git is installed, we use VS Code to interact with git.
Working with VS Code
Working with VS Code is going to be a four step process:
- Creating a project with manifest
- Authenticating to an org
- Importing CRMA assets into your local system
- Deploying CRMA assets to a specific Org
Rest of this section we will elaborate on each of these points. By the end of this section, you will know how to import CRMA assets into a local machine and deploy them in a specific org.
Creating a project with manifest
First we will create an empty project using Salesforce CLI plugin in VS Code. Later, we will use this project to import CRMA assets to a local machine. The manifest file refers to the package.xml file, which contains a list of assets that we want to either import or deploy.
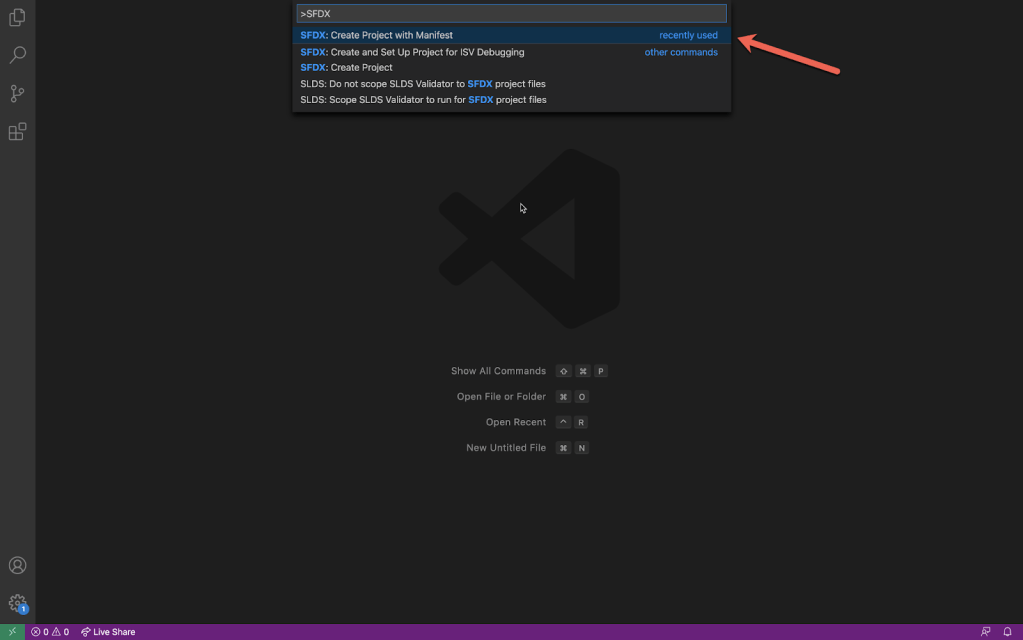
Hit CMD + Shift + P on mac or Ctrl + Shift + P on windows. Type SFDX: Create Project with Manifest and click on the option from drop down.
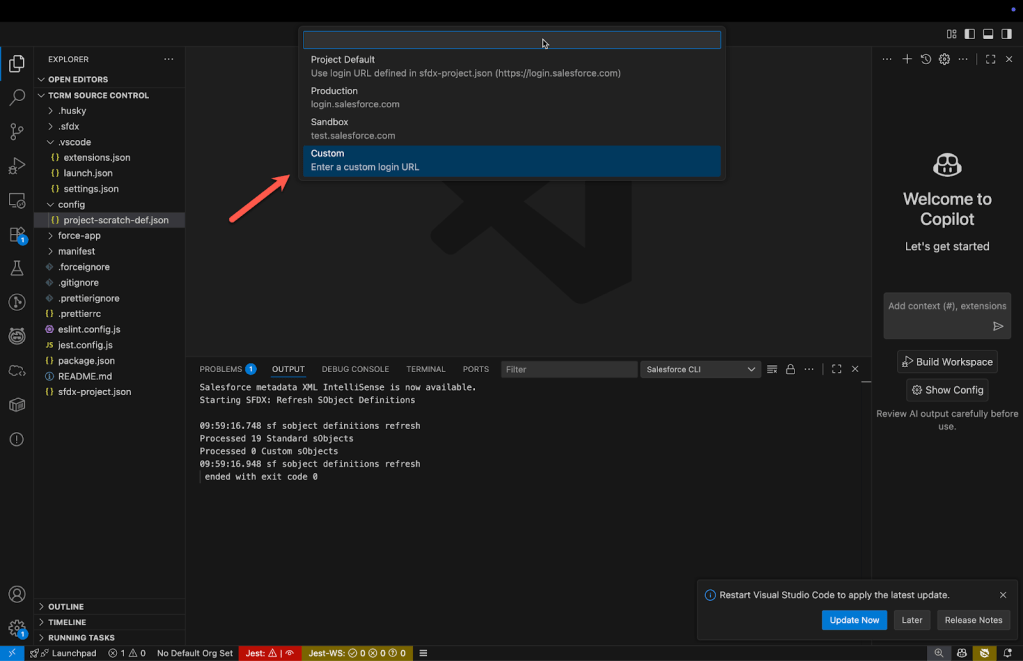
Then choose Analytics: Analytics project template. This template sets up VS Code for CRMA development.

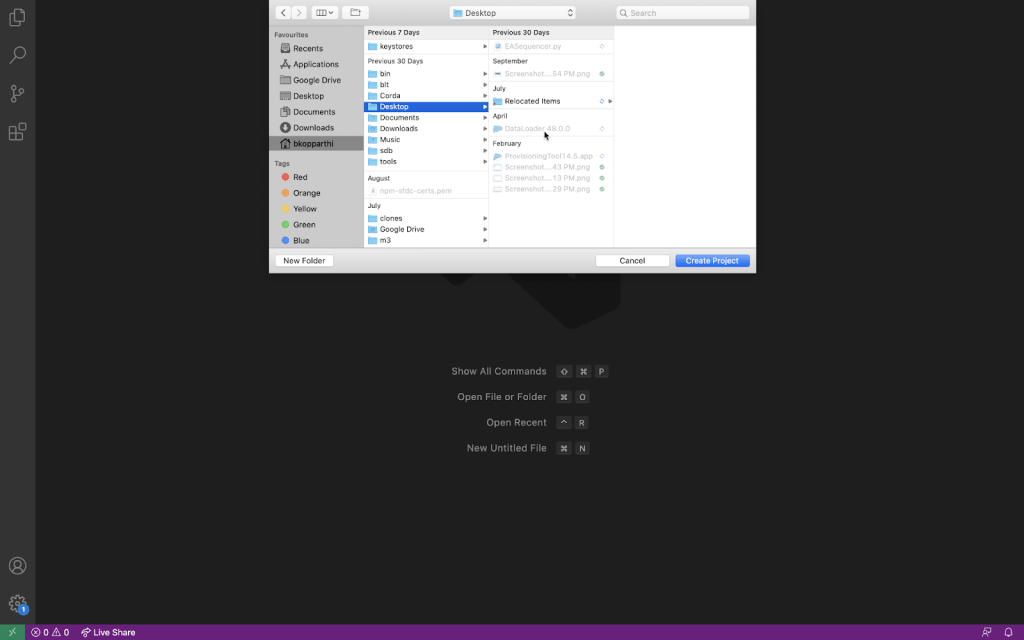
Then, give a meaningful name to the project. In my case, I chose TCRM Source Control as the project name.

Choose the folder in which you want to create this project.
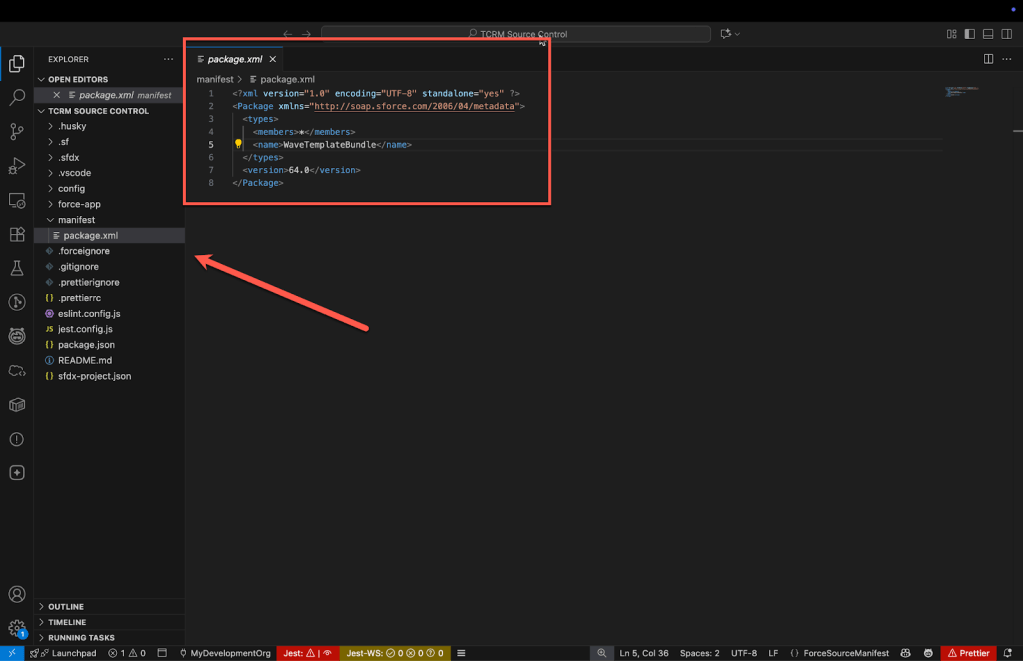
Once you create a project as suggested in the steps above, you will see a screen similar to the one below. You should be able to see the package.xml file under the manifest folder. Here the package.xml file is referring to all files of type WaveTemplateBundle.
Later in this post, we will examine all the asset types that you can work with.
Authenticating and Authorize an org
Before we can import or deploy any assets in Salesforce, we must first authenticate and authorize a Salesforce org. Our ability to import or deploy assets will be limited to the orgs that we authenticate and the privileges that we hold in those orgs.
To Authorize, press Cmd + Shift + P in mac or Ctrl + Shift + P in windows and type and choose SFDX: Authorize an Org.

Next, choose either a production or sandbox org to authenticate and authorize.
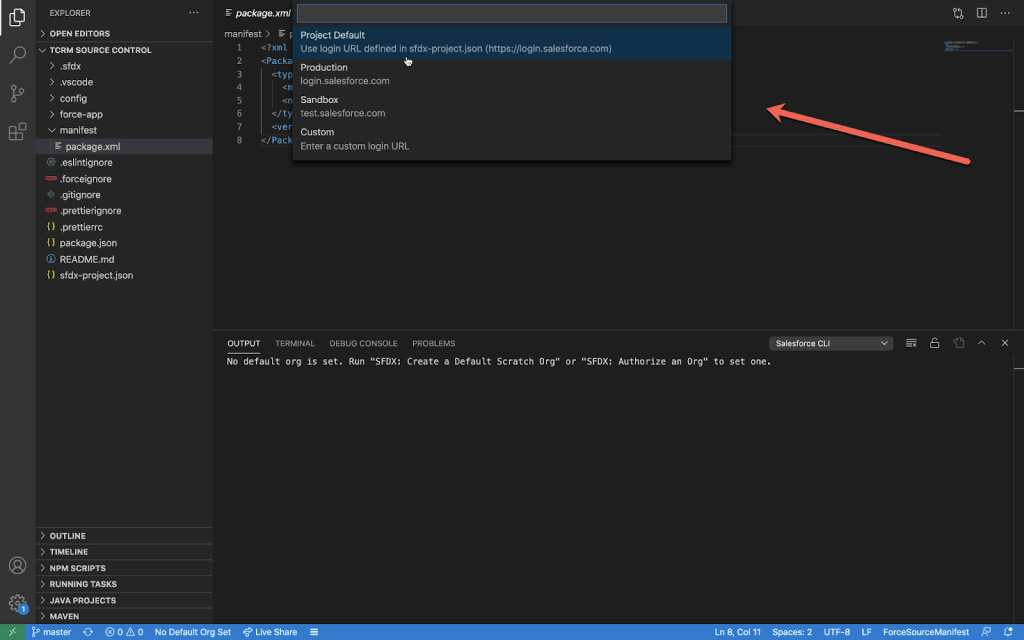
In case your org uses a custom domain, choose the Custom option and input your custom domain url as shown below:

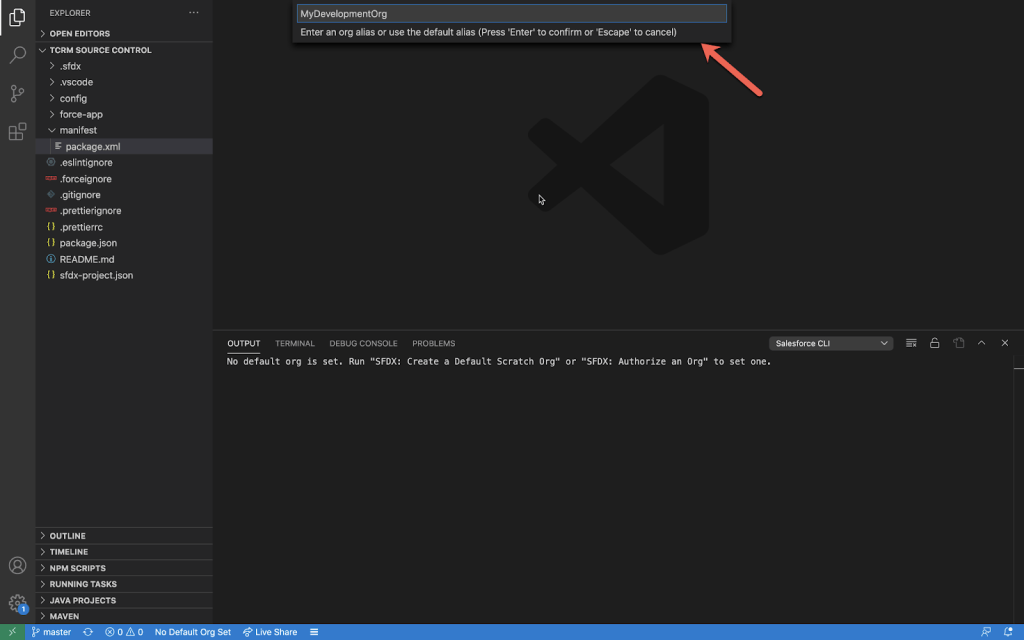
Once you configure the login url choose an alias name for the org that you are authorizing. This is just a local reference; this will have no impact on the org itself.
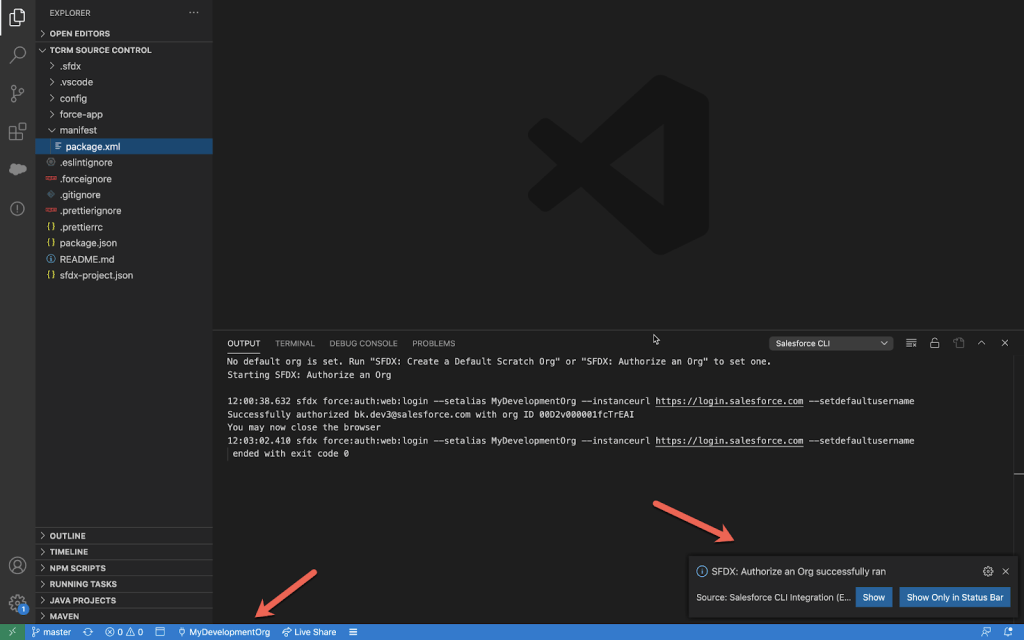
Then you will be redirected to a page on your web browser to authenticate. After you authenticate, you will be asked to authorize VS Code to access Salesforce org, and accepting it will enable VS Code to import and deploy assets.

After successful authentication and authorization, you will see a success message in VS Code as highlighted in the image below along with the org alias that you just authorized on the bottom left (find MyDevelopmentOrg on the bottom left).
Now we will look at importing CRMA Assets into the local machine.
Importing CRMA assets into your local system
All the assets that you are going to import into your local machine will be stored under force-app/main/default folder. At the beginning, this folder will be empty, as shown below. This will change once you begin importing CRMA assets into the local system.

Open manifest/package.xml file and paste the following code:
<types>
<members>testDashboard</members>
<name>WaveDashboard</name>
</types>
Replace testDashboard with the api name of your dashboard that you want to retrieve/import to your local machine. Alternately, you can put * to fetch all assets of a metadata type that you have access to.

Here are some additional metadata types that you can work with. If you want to get the complete list follow this post:
https://developer.salesforce.com/docs/atlas.en-us.api_meta.meta/api_meta/meta_intro.htm
<types>
<members>*</members>
<name>WaveDashboard</name>
</types>
<types>
<members>*</members>
<name>WaveDataset</name>
</types>
<types>
<members>*</members>
<name>WaveDataflow</name>
</types>
<types>
<members>*</members>
<name>WaveLens</name>
</types>
<types>
<members>*</members>
<name>WaveXmd</name>
</types>
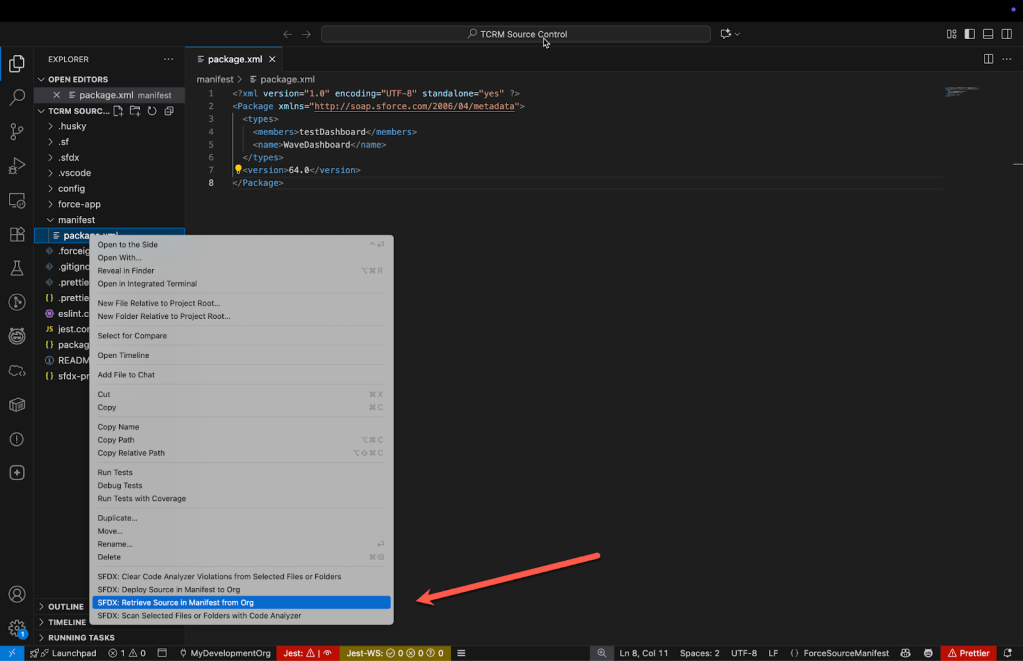
Then right click on package.xml and click on SFDX: Retrieve Source in Manifest From Org:
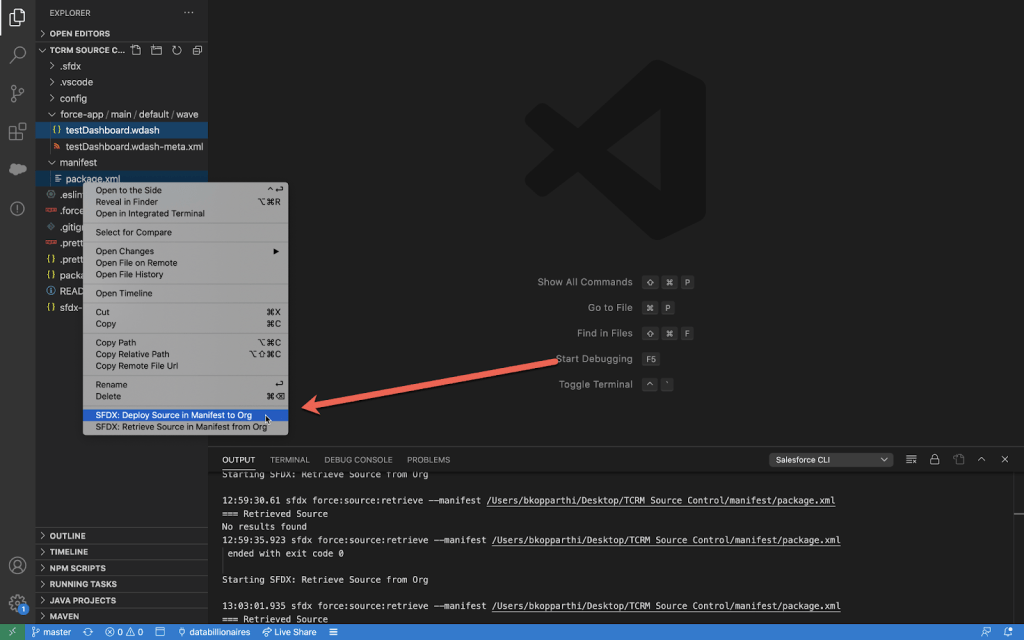
After a few seconds, you will find the asset in your local under force-app/main/default/wave as shown below:

Now we will look at deploying CRMA Assets into an org
Deploying CRMA assets to a specific Org
Deployments through VS Code are just as straightforward as importing.
First Authenticate and Authorize an Org to which you want to deploy. Click on org name at the bottom left and change it to the org you want to deploy.

I want to deploy to databillionares org, so I chose that.

Now right click on package.xml and choose SFDX: Deploy Source in Manifest to Org
It takes a while to deploy. Post deployment you will see a message saying deployment successful.

This marks the end of the VS Code importing and deployment section. Now we will look at using git for source control.
Source Controlling with git
Working with git is a three step process:
Creating a repository on github
Login to www.github.com and create a new repository. Give a meaningful name to the repository:
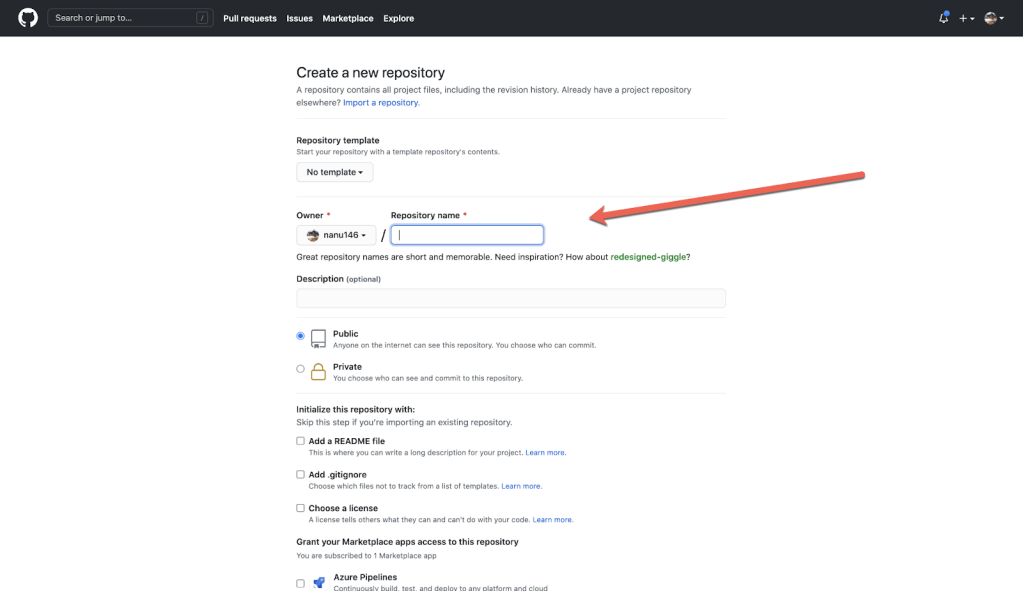
I named it TCRMSourceControl. We will use this repository to store CRMA Assets.

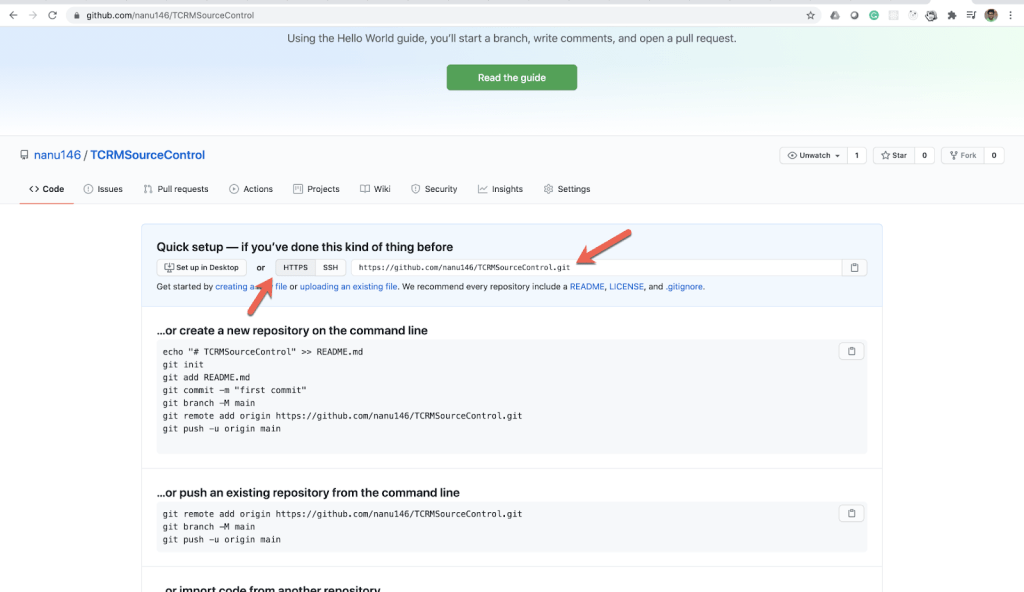
Pointing local code to github repository
Click on Https and copy the git URL:
Now launch VS Code and open the project we were working with. Go to View → Terminal.
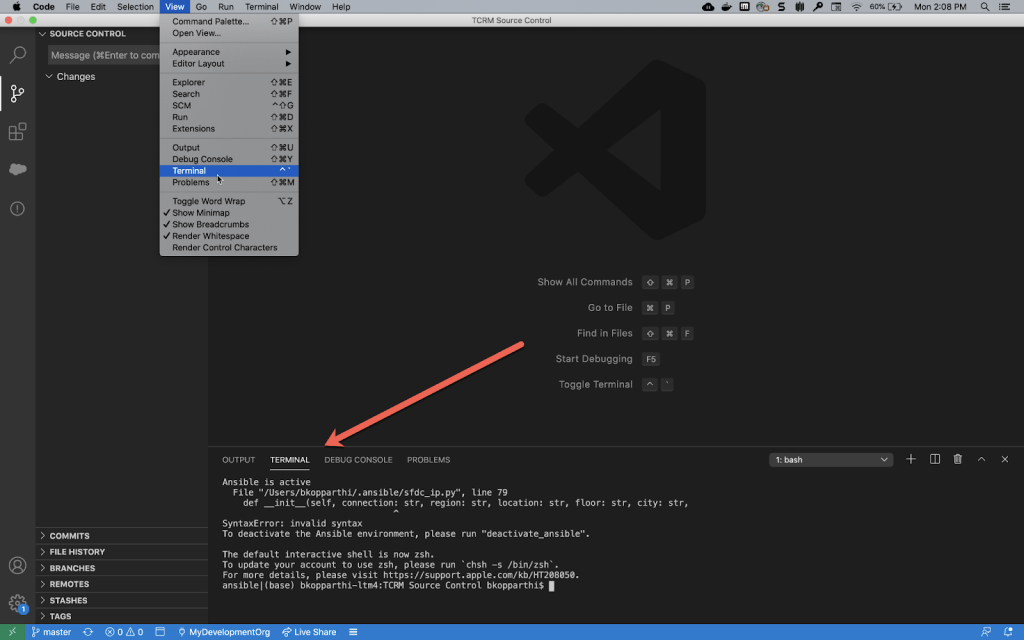
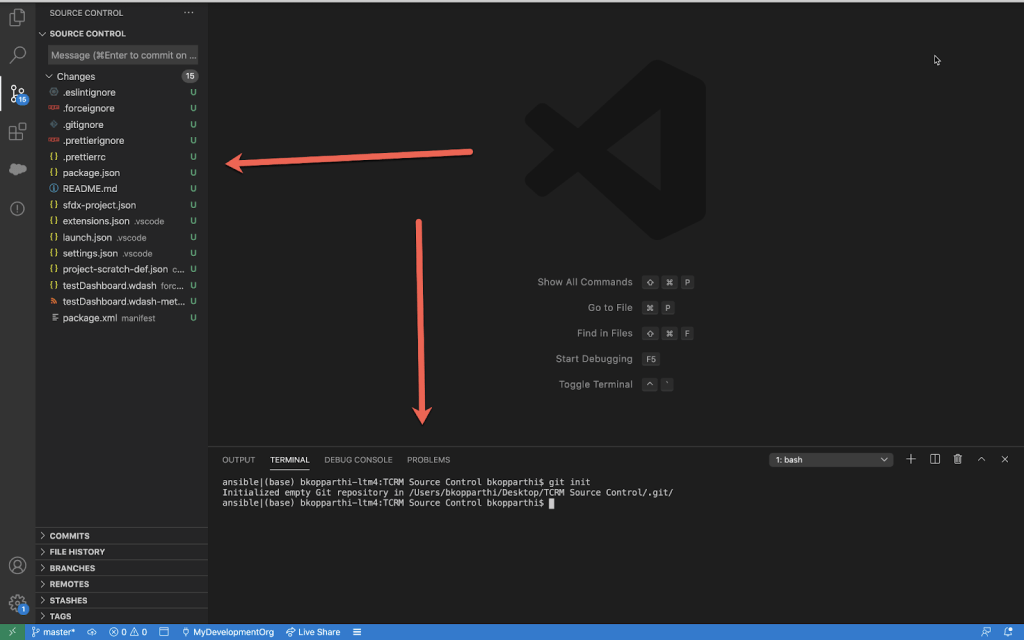
Type git init in the terminal as shown below, this command will initiate a local git repository. At this point, its not yet connected to TCRMSourceControl repository we created in github.com

Now you will see the list of changes that we can commit to local repository:
Next, we need to point the local git repository to TCRMSourceControl in github.com. The git repository in github.com in our case TCRMSourceControl is also called remote repository. Click on the three dots next to source control and choose Remote → Add Remote.

Input the correct git repo url:
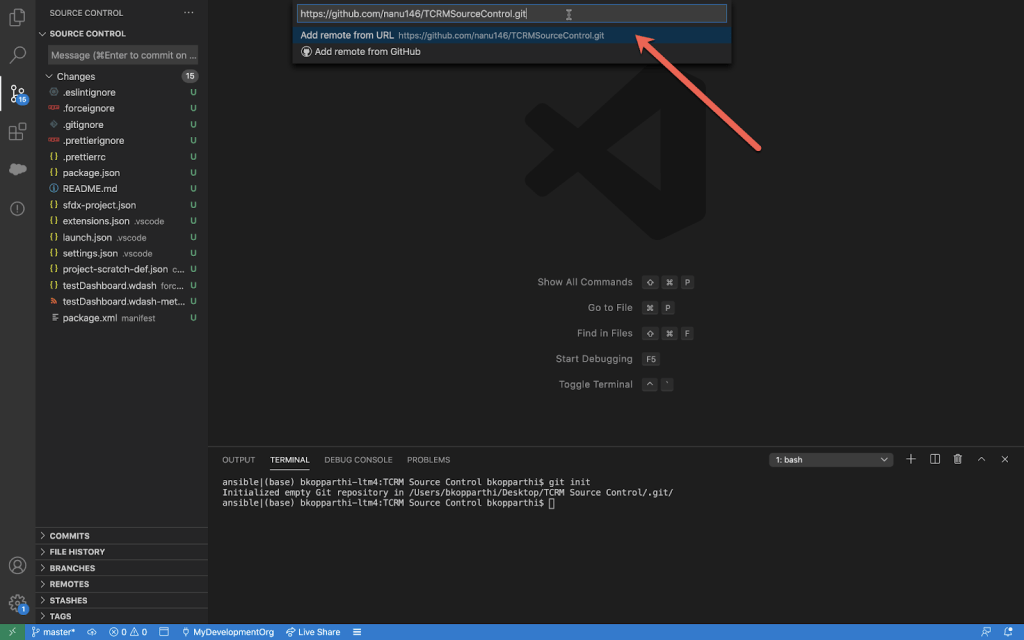
Input the remote name as origin as show below:

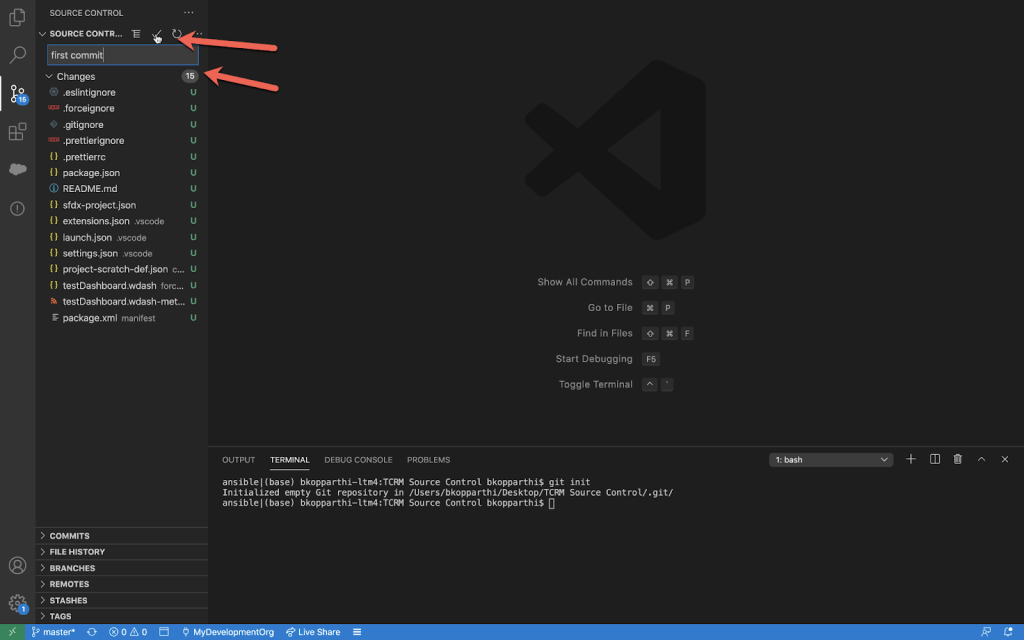
Now that we have configured the github.com remote repository, let’s save our work to it. To save our work to a repository we have to do what is called a commit to the repository. You can think of it as a checkpoint for all the work you have done until now. For future reference of this commit input a proper message and click on the check mark. At this point we have committed the changes locally, but the changes are not yet pushed to the remote repository.
Now, click on the three dots again and choose Pull, Push → Push
You will be asked to input your credentials to github.com and your local commits (code) will be pushed to the server.

Now to make sure our changes are synced to github.com open your repository to find the files we have committed as shown below:

Conclusion
This post walked you through the process of setting up your development environment to seamlessly deploy and source control CRM Analytics assets using a powerful combination of VS Code, Salesforce CLI and Git. By following these steps, you can streamline your CRMA development workflow, ensuring efficient version management for your analytics projects.
